
SAS Front Spring Drop Crossmember
Most solid axle swaps done on Toyotas tend to replicate the factory solid axle mounting system from 85 & older solid axle Toyota trucks and 4Runners. Although this method does work, I felt that it has some inherent problems that I would like to avoid.
One of the problems is that the rear shackle mounts on factory solid axle trucks are inside the frame. This is done with a tube through the frame for the shackle bushings. Not only is it difficult to replicate this method due to the angle of the frame, it also limits shackle travel as well as the location you can mount the shackle hanger. With the shackle mounted in the frame, as the shackle compresses it tends to hit on the frame limiting travel. Also, Since I had chosen to use longer front springs, this combined with the angle of the frame would have meant that use of an in the frame type hanger would have placed my shackle out of line with the front spring hanger.
After some discussion with James Stevenson, I chose to use factory rear shackle hangers from a Toyota truck. There are two styles used, one being wider than the other. I chose to use the ones from an 85 Toyota truck. This let me use a shackle that is straight, not the offset ones that came factory on the front of Toyota solid axle trucks.
The shackle hangers had been removed from a friend's truck when he went to a rear buggy leaf setup, but I understand these can be purchased from the dealer. If you do chose to remove them from a truck, it is not a difficult task using a cutting torch. Some careful work with a grinder could also work.
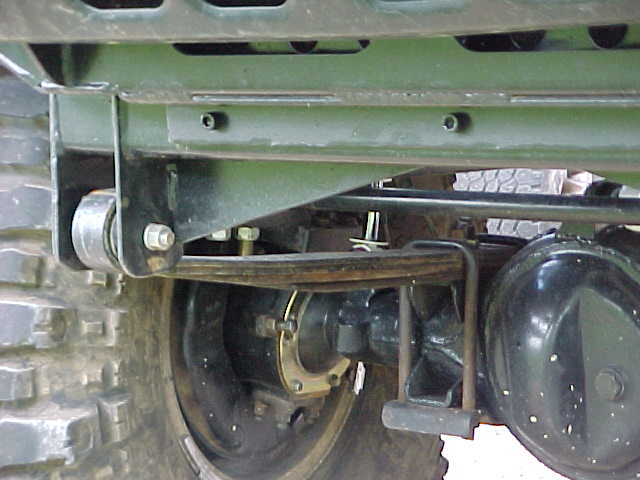
To prepare the shackle hanger for use under the frame, I welded a piece of plate to the base of the hanger for a better surface to attach it to the frame. Although this is not necessary, this does give you more surface area to weld to since the stock hanger was attached only by 2 vertical plates.
For shackles, I used some steel stock combined with parts from my old stock rear shackles. These shackles are slightly longer than stock. I believe they are roughly 1 3/4" longer than stock rear shackles.
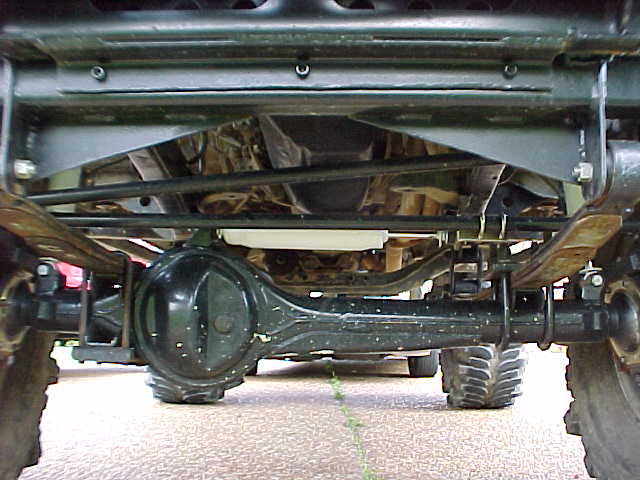
To compliment this new shackle hanger under the frame, I decided to also lower the front solid mount spring eye hangers. Doing this offers several benefits. By carefully measuring the angles involved, it was possible to lower the front the correct amount to eliminate the need for any type of shim to correct the caster and pinion angle. With the distance both ends of the spring are lowered, the axle is now set at the same angle as it came from the factory, eliminating any steering problems commonly associated with lifts. This also allowed me to get more lift (enough to clear 35" tires) with a relatively flat spring for a better ride and better wheel travel.
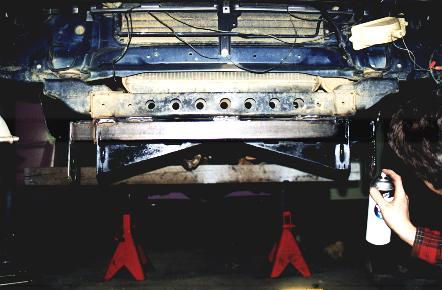
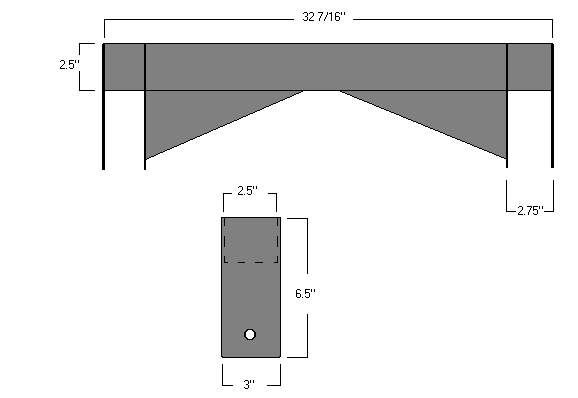
The design I settled on for a new lowered front crossmember was one I had seen used by Jay Kopycinski on his truck. Following his basic idea, I designed my own front crossmember. I started with a section of 2.5" x 2.5" (1/4" thick) square tubing. The end plates are 3" flat stock that is 1/4" thick, and the inner plates are 3/16" thick. To insert the inner plates, a slot was cut into he tube all the way through 3 of the sides. Once the plate was slid into the tube it was welded on all of the exposed seams. The end plates were then welded on to finish the main part of the hanger. I happened to have some 1/4" plate cut into triangular shapes, so I used that as cross braces to the inside plates, as well as to add a little visual flair ;).
Below is a basic drawing I made with measurements included. You will notice I did not include the measurements for the location of the spring eye bolt. Mine is roughly 1.5" from the bottom, but that could be different if I had changed a few other components. Depending on how much lift you want, you come raise or lower both the front mount hole and the height of the rear shackle hanger. With the system I used, I have approximately 3" of lift built into the hangers.
As always, if you use this design, please feel free to contact me & let me know. I would love to see any variations or improvements on what I did. Many thanks to Jay for sharing his idea with me.
| This page last modified 07/10/03 |
Questions? Concerns? email DRM |